Saturday, February 26, 2011

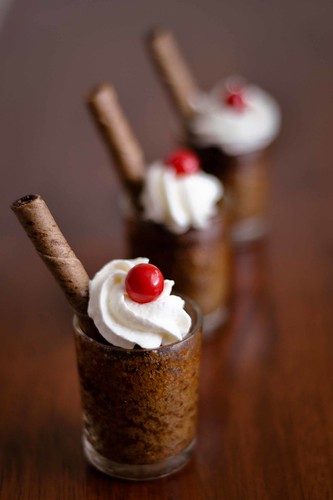
Mini Root Beer Float cupcakes

I randomly came across this recipe on Gourmet mom on the go a while back--and it's been starred on my toolbar waiting to be made...until today. :)

We had homemade pizza for dinner, and I thought this would be a fun dessert to go with! :)

031

I love several things about this recipe.
1. It's rootbeer. And while I don't drink pop much at all, I do love a good rootbeer now and then.
2. It's INCREDIBLY easy. Like, really, really easy.
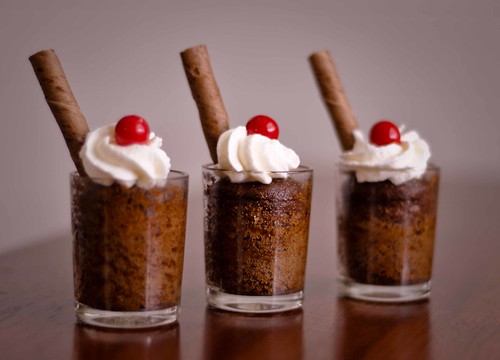
034


Ingredients: CUPCAKES

1 pkg.  Vanilla Cake Mix
1 Tbsp. Root Beer Extract  (in the spice aisle w/ the other extracts)
  (I used McCormicks root beer concentrate and it was just right!)
1 can Root Beer (I used diet root beer to cut back on the sugar)
Pirouettes or Creme Roulee wafer cookies 
Red Mini Gumballs (or other small red candy)
Clean votive candle holders or shot glasses (I used votive holders I picked up for .25 each at my local craft store. Just be sure to wash them well first!)


Directions:
Preheat oven to 350 degrees. Place 1 Tbsp. root beer extract in 2 C. measuring cup. Fill cup with Root Beer until it reaches 1 1/2 C. Be sure to let the foam fizzle down first so you can gauge accurately! (you'll have just a little bit of root beer left in your can when you're done). Add to cake mix and stir well. No eggs, no oil, easy!!

Place shot glasses/votive holders on a baking sheet and spray with nonstick cooking spray. Fill 1/2 full with cake batter and bake at 350 degrees for 18-22 minutes until done. Remove from oven and let cool completely. Cut round wafers in half. Put frosting in canvas bag w/ star tip (or you can just put it in a ziploc baggie and snip off one end). Pipe a dollop of icing onto each cupcake, top with a gumball and half of a wafer cookie. Serve or refrigerate until needed.


***The original recipe suggests using your favorite homemade or canned frosting, so I want to share my own recipe.  I loved the light texture--felt it was perfect for root beer floats! 

FROSTING:
1 small box vanilla or white chocolate pudding (I used fat free/sugar free white chocolate)
1 C milk
1 8 oz. container of Cool Whip free

In a bowl, mix milk and pudding together till thickened. Gently fold in cool whip till thoroughly combined. Put frosting in canvas bag w/ star tip (or you can just put it in a ziploc baggie and snip off one end). Pipe a dollop of icing onto each cupcake, top with a gumball and half of a wafer cookie. Serve or refrigerate until needed.

SERVING: 
The original recipe called for 36 mini cupcakes. I only bought 10 votive holders, and did the rest in cupcake liners. (got 12 cupcakes and 10 mini cupcakes.) I am figuring the cupcakes were about double what I put in the votive holders, and am assuming that I got 34 cupcakes out of mine.


So for my WW friends who are counting...

 34 mini cupcakes, it would be only 2 pt+ each!
or
18 regular cupcakes in wrappers would be 3 pt+ each.

The frosting is really low points as well...
I frosted all my cupcakes and still had quite a bit leftover! If you frost more than 27 cupcakes with it, it's ZERO pt+!!
Anything less comes to 1 pt+ 
(which I think it still fantastic considering what most frosting comes to!)

And 1/2 a Pirouette is 1 pt+

SO, total points for a mini cupcake with frosting and yummy round wafer: 3 pt+


Wednesday, February 23, 2011

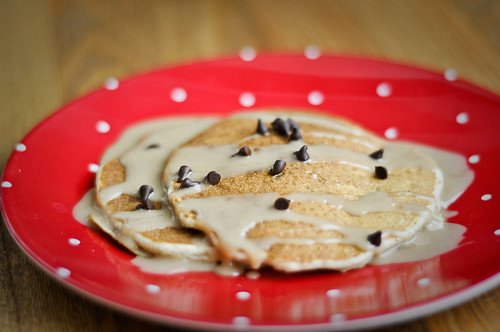
Chunky Monkey pancakes with peanut butter syrup

I came across this recipe on Our Best Bites and was hooked! I HAD to find a way to make it more point friendly...and in the end, I'd it was a smashing success! :) (and a very filling one at that!)


002

1 C white flour
1/2 C whole wheat flour
3 Tbs sugar
2 tsp baking powder
1 1/2 tsp baking soda
1/4 tsp salt
1 1/2 C fat free buttermilk ***
1 tsp vanilla extract
1 Tbs canola oil
1 large egg
1 small-med ripe banana
1/8  C mini chocolate chips (or reg. chips roughly chopped) tossed with 1 tsp flour
Cooking Spray or butter for pan


3/4 C Cary's sugar free maple syrup
1/4 C peanut butter
(You could add up to 1 C of syrup without altering the pt+ value, if you want to get more out of it!)


*I made this up by mixing 1 1/2 Tbs lemon juice or vinegar in a 1 1/2 C measuring cup and then fill the remainder with milk. 

Combine flours, sugar, baking powder, baking soda, and salt in a mixing bowl and whisk together. In a separate bowl combine buttermilk, eggs, oil, and vanilla and whisk well. Add the wet ingredients into the dry and mix just until moistened and combined. Place bananas in a bowl and roughly mash with a fork. Fold into batter. Add the chocolate chips that have been tossed with flour and stir.


For syrup, heat peanut butter and syrup in a bowl in the microwave for 30 second. Stir, and continue heating for another 15-30 seconds.


Heat a nonstick griddle or skillet to medium heat. Spray with non-stick spray and using a 1/4 C scoop, ladle batter onto hot grill. Wait until bubbles form and edges are set and then flip.


Reheat syrup if necessary and pour over warm pancakes.


Yield:

14- 4-6" pancakes (using 1/4 C batter measure)   5 pt+

peanut butter syrup  (per 2 TBSP)  2 pt+


(note: mini chocolate chips on my pancake are for photo sake only! :) If you do the same, be sure to count the pts for it!)

Oven Fries

week 1 tracking 012

I LOVE french fries. LOVE them. :) And I LOVE that there is a healthier way to make homemade fries without a big pan of grease--that actually taste DELICIOUS!

2 pounds red potatoes (sliced into steak fry size bites)
2 tablespoons olive oil
1 teaspoon salt
1/4 teaspoon paprika
1/8 teaspoon pepper

Directions
Cut each potato into 1/2 inch fry-size pieces. Rinse well and pat dry. In a large bowl, combine the oil, salt, paprika and pepper; add potato wedges and toss to coat. (or you can also do this in a gallon ziplock bag to coat them)
Spray a baking sheet with nonstick spray and add fries in a single layer. Bake on lowest oven rack at 475° for 20 minutes. (your oven may vary, so just watch them the first time you make these to make sure). Turn potatoes; bake 15 minutes longer or until golden brown.

makes approx. 14 ounces total.

Serves 7 (2 oz. servings)


2 pt+

Tuesday, February 22, 2011

Tuna Noodle Casserole

Another fave from skinnytaste.com with the alterations we used...the kids LOVED this--gobbled it right up! Even though it has mushrooms...which we are all still learning to love! :) Mushrooms and all, it was a big hit!
v-day food 018


  • 6 oz no yolk noodles (you can use Ronzoni Healthy Harvest, or brown rice pasta for gluten free)
  • 1 tbsp butter
  • 1 medium onion, minced fine
  • 3 tbsp flour (gluten free use rice flour)
  • 1 3/4 cups fat free chicken broth
  • 1 cup skim milk
  • 5 oz sliced baby bella mushrooms (she used more, but we felt 5 oz. was plenty!)
  • 1 cup frozen petite peas (thawed)
  • 2 (5 oz) cans tuna in water, drained (I used albacore)
  • 1C reduced fat cheddar
  • butter flavored cooking spray
  • 2 tbsp parmesan cheese
  • 2 tbsp whole wheat (or white) seasoned breadcrumbs

Cook noodles in salted water until al dente, or slightly undercooked by 2 minutes. Set aside.

Melt the butter in a large deep skillet. Add onions and cook on medium heat until soft, about 5 minutes. Add the flour and a pinch of salt and stir well, cooking an additional 2-3 minutes on medium-low heat

Preheat oven to 375°. Lightly spray 9 x 12 casserole with butter flavored cooking spray.

Slowly whisk in the chicken broth until well combined, increasing heat to medium and whisking well for 30 seconds, then add the milk and bring to a boil. When boiling add mushrooms and petite peas, adjust salt and pepper to taste and simmer on medium, mixing occasionally until it thickens (about 6-7 minutes).Add drained tuna, stirring another minute.


Remove from heat and add 1 cup reduced fat cheese and mix well until it melts. Add the noodles to the sauce and mix well until evenly coated. Pour into casserole and top with parmesan cheese and breadcrumbs. Spray a little more cooking spray and top and bake for about 20 - 25 minutes. Place under the broiler a few minutes to get the crumbs crisp (careful not to burn).

Serves 6 large portions  8 pt+

Baked Oatmeal

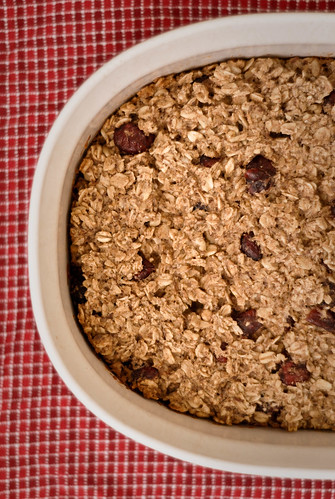
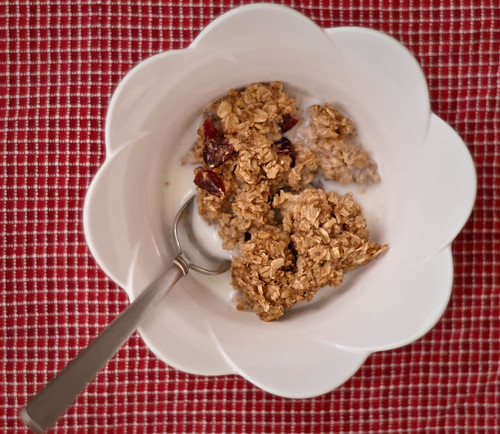
I'll be honest. I'm not an oatmeal fan. But as I've been on my weight loss journey, I've tried to like it more, because I know it has loads of health benefits! I found this recipe recently, and was determined to give it a try and make it a little healthier than originally posted. LOVE AT FIRST BITE. YUM. I served mine with about 1/4 C warm milk, and it was almost like a soft granola. VERY good and warm...and filling! :)


last day tracking 004

3 c. oats (not quick-cooking)
1/2 c. brown sugar
1 tsp. salt
2 tsp. cinnamon
2 tsp. baking powder
1/2 c. Craisins, raisins, dried cherries, or other dried fruit
1 c. milk
2TBSP butter
1/4 C unsweetened applesauce
2 tsp. vanilla
2 eggs (or instead, I used 2 TBSP ground flaxseed with 6 TBSP water)


Preheat oven to 350. In a large bowl, combine the oats, brown sugar, cinnamon, baking powder, salt, and Craisins. In a smaller bowl, mis together the milk, butter, vanilla, and eggs (or flaxseed mixture). Add the liquid mixture to the dry mixture and whisk to combine. Pour into a deep 9" pie plate or an 8x8" or 9x9" baking dish. Bake for 40 minutes or until the top is golden brown. Serve immediately with a splash of warmed milk. 

Serves 8  -  7 pt+  (served with additional milk is extra pt+)


last day tracking 009

Wednesday, February 16, 2011

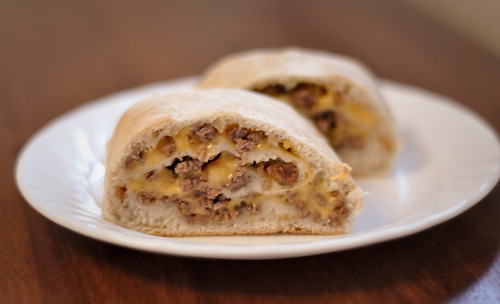
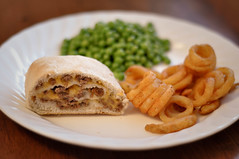
Bacon cheeseburger rollup

daddy daughter date 035

I like to think of this as our wintertime burger--it's fast, easy, no grill needed...and it fits the bill when you're wanting the burger taste, but not the burger calories!

1 pillsbury classic pizza crust
8 oz uncooked lean ground beef (7% fat)
1/2 C hormel bacon pieces (or 7 pieces of turkey bacon cooked crisp and crumbled)
1 C reduced fat cheddar cheese
1/2 small onion, diced

In nonstick pan, cook ground beef with onion--let cool.
Meanwhile, spray a cookie sheet with non-stick spray and roll out pizza crust. Gently flatten dough with your fingers (the goal is to make it a little thinner, but not TOO thin). 

Once the meat has cooled, sprinkle it over the dough, leaving approx 1/2-1 inch around the edges. Sprinkle bacon and cheese over meat. 

Starting from one edge, roll up horizontally like you would when making cinnamon rolls (you want to have a long roll, not a shorter one), Pinch the seam together and place underneath the rollup on the cookie sheet.

Bake at 425 degrees for 15-17 minutes or until golden brown.

Let cool for a few minutes, and then slice to serve! We usually cut into 9 slices--1 slice per serving. Dip in whatever sauce you like. Perfect for little fingers! :)

SERVING: 1 slice  5 pt+


daddy daughter date 037

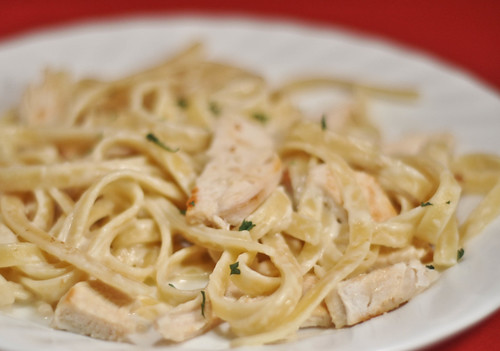
Guiltless Alfredo sauce

v-day food 028

Guiltless Alfredo Sauce
courtesy of Our Best Bites
2 C low-fat or skim milk 
1/3 C (3 oz) low fat cream cheese
2 T flour
1 t salt
1 T butter
3 garlic cloves
1 C fresh grated Parmesan cheese


Put the milk, cream cheese, flour, and salt in a blender. Process until smooth and set aside.

In a non-stick sauce pan, melt butter on med-high heat and add garlic. Let the garlic saute for about 30 seconds. Then add milk mixture to the pan. Stir constantly for about 3 or 4 minutes or until it just comes to a simmer. Keep stirring and let it cook for a few minutes more. It should be much thicker now.


When it's nice and thickened remove the pan from the heat. Add the cheese, stir it up and then cover immediately. Let stand for at least 10 minutes before using. It will continue to thicken upon standing. Also, if you have leftovers in the fridge, the sauce will thicken almost into a solid. Just re-heat and add a little milk and it will be back to normal again.

MAKES approx 2 C of alfredo sauce.

I found that 1/4 C was a pretty good serving, so I am basing my serving size off of that.

SERVES 8  -   1/4 C servings   3 pt+ 

Sunday, February 6, 2011

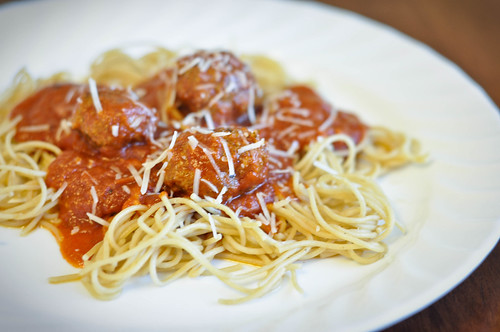
Italian Meatballs

spaghetti and meatballs

(adapted from this recipe)

  • 1.3 lb. lean ground beef (I used 7% fat)
  • 1/4 cup breadcrumbs
  • 1 tsp Italian seasonings
  • 1/4 cup fresh grated parmesan cheese
  • 1/4 cup parsley, finely chopped
  • 1 egg
  • 1 clove garlic, minced
  • 1 tsp kosher salt
  • 1 tbsp olive oil


In a large bowl, combine ground beef, breadcrumbs, egg, parsley, garlic and cheese. Using your (clean) hands, mix all the ingredients well until everything is combined. Form small meatballs, about the size of a ping ping ball (1/8th cup each).


Heat the 1 tbsp olive oil on medium high in a large saute pan. Add the meatballs and saute until browned on all sides, about 5 minutes. (Don't worry about cooking all the way through at this point.) When brown, place on a paper towel to soak excess oil, then add the meatballs to your sauce and cook about 20 minutes. (I just used a jarred Ragu sauce).

This is delicious on with Spaghetti or on a sub sandwich! 


make 27 meatballs (makes 9 servings of 3 meatballs each)  3 pt+

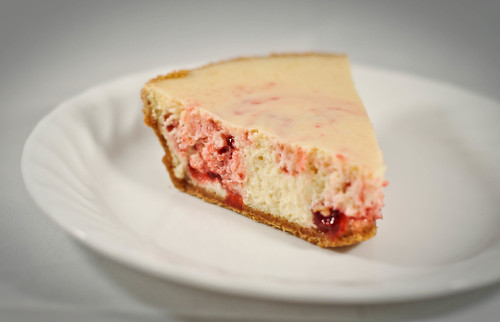
Strawberry Swirl Easy Cheesecake

While this IS a higher point dessert, it's super tasty and a great way to get your cheesecake fix without going completely overboard! :)

week 1 tracking 044

8 oz. 1/3 less fat cream cheese
1/4 C lemon juice
1 egg
1 ready crust (25% less fat graham cracker crust)
1/2 C strawberry preserves
1 can (14 oz) sweetened condensed milk

  • In small mixing bowl beat cream cheese on medium speed of electric mixer until fluffy. Gradually beat in sweetened condensed milk and 3 tablespoons of lemon juice. Add egg, beating until just combined.

  •  Pour half of cream cheese mixure into crust. In small bowl combine preserves and remaining lemon juice. Spoon half of preserves mixture over cream cheese mixture in crust.

  •  Top with remaining cream cheese mixture and remaining preserves mixture. Use knife or narrow spatula to swirl preserves into cream cheese mixture.

  • Bake at 300°F for 50 to 55 minutes or until center is almost set. Cool on wire rack for 1 hour. Refrigerate at least 3 hours.

  •  Garnish as desired. Store in refrigerator.
Serves 8 pieces  -  10 pt+ each

Saturday, December 18, 2010

Hash brown casserole


6 slice(s) uncooked turkey bacon, sliced crosswise into 1⁄4-inch strips   
3 cup(s) frozen hash brown potatoes, 12 ounces   

1/2 medium onion, diced

3 large eggs  

3 large egg whites
1/2 diced red pepper * (optional)
3/4 cup(s) 1% low-fat cottage cheese, small-curd   
2/3 cup(s) low-fat shredded cheddar cheese   
3 Tbsp grated Parmesan cheese, freshly grated   
3 Tbsp all-purpose flour   
3/4 tsp poultry seasoning, or ground sage   
1/2 tsp baking powder   
1/4 tsp table salt   
1/4 tsp black pepper, freshly ground  
  • Place the oven rack in the center of the oven; preheat oven to 375ºF. Spray a 1 1⁄2-quart shallow baking dish with nonstick spray.
  • Spray a large nonstick skillet with nonstick spray and set over medium heat. Add the bacon and cook until nearly crisp, stirring occasionally, 4 minutes. Add the onions and cook for another minute or two until lightly browned, then add the potatoes; continue cooking and stirring until tender, about 7 minutes. Remove from the heat and let cool slightly.
  • Beat together the eggs and egg whites in a large bowl until blended. Beat in the cottage cheese, 1⁄3 cup of the cheddar cheese, the Parmesan cheese, flour, poultry seasoning or sage, baking powder, salt, and pepper until combined. Stir in the cooled potato mixture and spread evenly into the baking dish. Bake until golden and set in the center, about 30 minutes. Sprinkle evenly with the remaining 1⁄3 cup cheddar cheese. Let stand until the cheese is melted, about 10 minutes, and serve hot or warm.

Serves 6  (6 pt+)

Friday, December 17, 2010

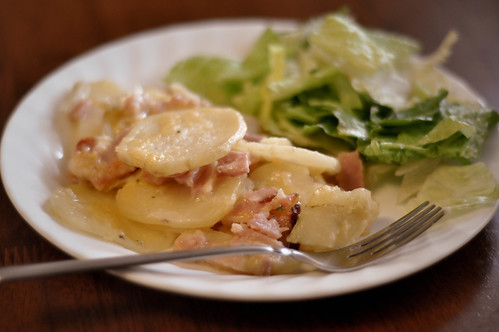
Cheesy Scalloped potatoes and ham

014


This is a delicious comfort food that feeds a crowd and is perfect for using leftover ham.
 (you may omit the ham if you prefer)

Cheesy Scalloped potatoes and ham

1 TBSP Butter
2 TBSP flour
2 C milk
1 tsp salt (reduce salt if you are using ham)
1/2 medium onion (finely diced)
1/4 tsp pepper
1 TBSP. Parsley flakes
1 C reduced fat cheddar cheese (grated)
2 pounds red potatoes (thinly sliced)
6 oz ham, cubed

Preheat oven to 375.

In a large saucepan, melt butter over medium heat. Add onion and cook until onions are translucent. Mix in the flour , and stir constantly with a whisk for one minute. Stir in milk. Add salt, pepper, and parsley. Cook until mixture has thickened (will be several minutes). Stir in cheese and continue stirring until melted, about 30 to 60 seconds.

Add potatoes and stir to mix thoroughly. Then pour mixture into a greased 9x13 baking dish. 

Cover with foil and cook for 25-30 minutes. Remove tinfoil and continue cooking another 25-30 minutes or until potatoes are tender.


Allow to cool for 5-10 minutes before serving. 


Serves:


6 servings  -  7 pt+  (without ham  5 pt+)


8 servings  5 pt+  (without ham, 4 pt+)


Saturday, December 4, 2010

UNDER CONSTRUCTION....my little blog remodel

It's been a long time since I posted--for good reasons, really. (if anyone out there reads this blog anymore!!)

For those of you who don't know me personally or read my family blog, I can tell you it's been a BUSY few months! I had my baby in July, my appendix out in August, school starting in September, my husband gone the whole month of October, and obviously holidays and such in November...lots has been going on.

And on top of that, I've been working like a madwoman to lose some weight that I have been carrying around for WAY too many years! I joined weight watchers at the end of July, and since then have lost 43 pounds to date! I FEEL SO GOOD.

I have a lot of people asking me what I have been eating to lose weight--and the simple truth is, I eat what I already was making...I just know the correct portion size now and have found some ways to make certain dishes with less fat and unhealthy stuff. I personally love food too much to abandon it for salad. :) But finding a happy medium  has been JUST what I needed to be healthier.  The weight loss journey I have been on isn't just to shed the pounds...it's been for my whole family to become healthier overall, so that we can hopefully raise our children embracing a lifestyle of health and wellness--tasty food AND dessert included! :)

While I can't promise each recipe can be remade in a healthier way (sometimes you've just got to splurge!), I DO plan on going back through each of my posts and making each dish according to the recipe I have written and updating them as I make changes (because sometimes I tend to do that without thinking, and the new way is really the easier or better way! :)

Am hoping to be able to put nutrition facts with my meals, as well as portion size--but I will be adding the new WW points plus values to each my my recipes--if for no other reason than my own reference, because we as a family plan on eating healthy for  life! If you know people who are doing WW or plan on joining, send them over! I hope to help prove that you don't need a bunch of frozen diet meals and salad to lose the weight and be healthy--

:) Anyway, please excuse the virtual dust as I make over these recipes (and pictures!!) so it will be a more user friendly (and healthy) place...

Tuesday, October 5, 2010

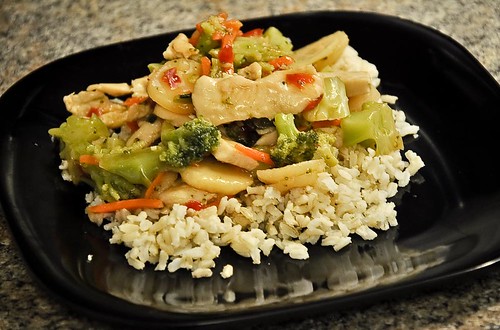
Chicken stir-fry and rice

I adapted this recipe from my beef and broccoli recipe, but when I only had chicken on hand. WE LOVED this dish and will definitely make it like this on a regular basis!

chicken broccoli recipe 014-2


  • 3 TBSP cornstarch
  • 1 1/2 C Hot water
  • 2 chicken boullion cubes
  • 3 tablespoons soy sauce, reduced sodium
  • 8 oz. chicken breast, thinly sliced
  • 1/4 teaspoon ginger
  • 1 pound frozen cut broccoli (or fresh)
  • 1 C shredded carrots
  • 1 can water chestnuts
  • 1 red pepper, diced
  • 1 clove garlic, minced
  • 1/2 small onion diced
  • 1/2 tsp salt (more if desired)
  • 1 TBSP olive oil

Directions

In a small bowl, combine cornstarch, hot water, bullion, and soy sauce. Stir until sugar and cornstarch are dissolved.

In a large skillet or wok over high heat, cook and stir chicken 2 to 4 minutes, or until lightly browned. Add salt and onions and cook until translucent. Stir in broth mixture, ginger, garlic, and vegetables. Bring to a boil, then reduce heat. Simmer 5 to 10 minutes, or until sauce thickens.


ENJOY! :)

 Serves 7-8 one cup servings (depending on how many veggies you put in)

1 Cup of Chicken and veggie dish is 3 +points
1 Cup of Chicken and veggie dish served with 1/2 C brown rice is 6 +points 

Friday, September 3, 2010

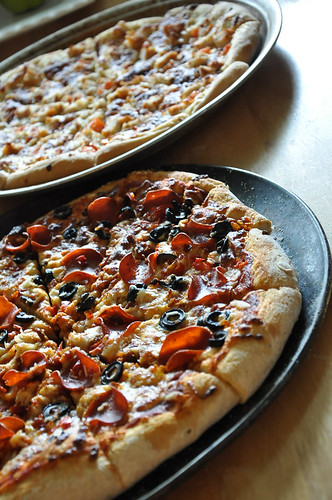
Our PERFECT pizza crust

week with holloways 110-2

We make homemade pizza almost every week--and so we have gone through our share of recipes in search of the PERFECT recipe. I think we are to the point of discovering what OUR favorite is--and this would be it! I especially like this because weighing the amount of flour called for, is ALWAYS the perfect amount. I never have too much or too little when I weigh it instead of using a measuring cup. (if you don't have a kitchen scale, get one! They are SO worth it!!) This is SUCH an easy throw together dough! And it tastes and BAKES fabulous!

I originally got this recipe from Annies Eats. But I felt like the directions were way more complex than they needed to be. So we simplified, and changed it up a little, it and it has worked wonderful EVERY time!

I have left out the oil and it's been just fine. So if you're counting calories or don't have EVOO on hand, you'll be fine. :) And I have found this dough actually rises faster than expected--so keep an eye on it.


And ENJOY! :)


ingredients:

1 3/4 cup warm water
2¼ tsp. instant dry yeast
4 cups (22 oz.) bread flour, plus more for dusting
1½ tsp. salt

2-3 TBSP Italian seasonings

2 TBSP. extra virgin olive oil (optional)


Directions:

In a bowl, weigh your flour. After weighing the appropriate amount, add your yeast, salt, and seasonings to the flour and mix well. In a mixer add your warm water and slowly add your flour mixture. Knead on low speed until smooth and elastic, about 5 minutes. Transfer to a lightly oiled bowl, turning once to coat. Cover with plastic wrap and let rise until doubled in size, 1 - 1 1/2 hours.

Press down the dough to deflate it. Transfer the dough to a lightly floured work surface. Divide the dough into two equal pieces. Form each piece of dough into a smooth, round ball. (If freezing the dough, wrap in plastic wrap and freeze at this point.) Cover with a damp cloth. Let the dough relax for at least 10 minutes but no longer than 30 minutes.

To bake, preheat the oven and pizza stone to 500˚ F for at least 30 minutes. Transfer the dough to your shaping surface, lightly sprinkled with cornmeal. Shape the dough with lightly floured hands. Brush the outer edge lightly with olive oil. Top as desired. Bake until the crust is golden brown, and cheese is bubbling, 8-12 minutes.