Sunday, April 18, 2010

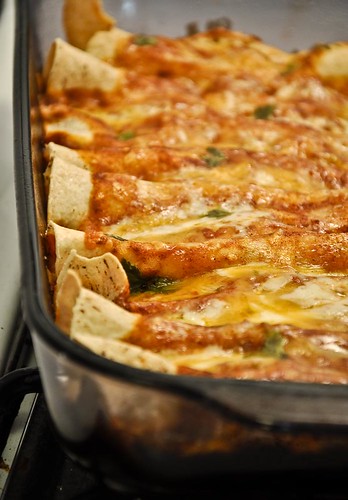
Enchiladas


originally found here. Shared here with my adjustments.

1 medium onion, chopped fine
1 tsp. canola oil
3 cloves garlic, minced
3 tbsp. chili powder
2 tsp. cumin
1 tbsp. sugar
1 (15 oz.) can tomato sauce
1 cup water
1 tomato, seeded and chopped
Salt and pepper
1 lb. boneless, skinless chicken breasts
4 oz. shredded cheddar cheese, divided
½ cup minced fresh cilantro
12 (6-inch) soft corn tortillas
Cooking spray
Directions:
Combine the onion and oil in a large saucepan over medium heat. Cook, stirring often, until the onions and. Stir in the garlic, chili powder, cumin and sugar, and cook just until fragrant, less than 30 seconds. Mix in the tomato sauce, water, and chopped tomato. Bring the sauce to a simmer, lower the heat and cook until slightly thickened, about 5 minutes.
Nestle the chicken into the sauce. Reduce the heat to low, cover and cook until the chicken is completely cooked through (160˚ F on an instant-read thermometer), about 12-20 minutes. Transfer the chicken to a plate and set aside to cool.
Strain the sauce through a large mesh strainer into a medium bowl, pressing down on the onions and tomatoes to extract as much liquid as possible. Transfer the reserved solids to a large bowl and set aside. Season the sauce with additional salt and pepper to taste. (though in my opinion, you don't really need to add any because there are so many great spices already going on)
Shred the chicken into bite size pieces and add to the bowl with the onion mixture. Add in ¼ cup of the enchilada sauce, 2 oz. of the shredded cheese, and the cilantro. Stir to combine.
Preheat the oven to 425˚ F. Oil a 9 x 13″ baking dish with cooking spray. Stack the tortillas on a plate, cover with plastic wrap, and microwave for 40-60 seconds, until warm and pliable. Spoon 1/3 cup of the chicken mixture evenly down the center of a tortilla. Roll up the tortilla around the filling tightly, and place in the prepared baking dish, seam-side down. Repeat with the remaining filling and tortillas.
Lightly spray the tops of the enchiladas with cooking spray. Place in the oven, uncovered, for 7 minutes or until the tortillas start to brown slightly.
Reduce the oven temperature to 400˚ F. Remove the enchiladas from the oven and pour the sauce oven the top. Sprinkle with the remaining shredded cheese. Cover the dish with foil and bake for 20 minutes.
Remove the foil and bake for 5 more minutes, until the cheese is browned. Remove from the oven and let stand 10 minutes before serving.

Makes 12 enchiladas

Serves 6 = (2 enchiladas per serving) 8 pt+

Sunday, April 11, 2010

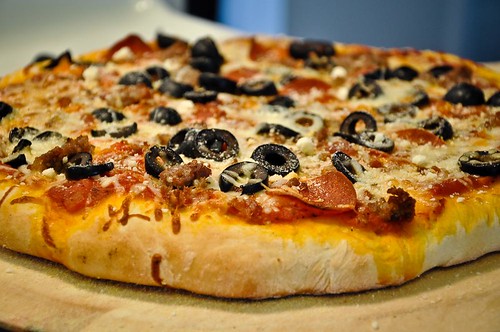
Pizza Dough

  • 2 (.25 ounce) package active dry yeast (or 5 tsp. if you are using bagged yeast)
  • 2 teaspoon white sugar
  • 2 cup warm water (110 degrees F/45 degrees C)
  • 5-6 cups bread flour (though I used All purpose and had no problems)
  • 4 tablespoons olive oil
  • 4 tsp. Italian seasoning
  • 1 tsp garlic powder
  • 2 teaspoon salt

Directions

  1. Preheat oven to 450 degrees F (230 degrees C). In a medium bowl, dissolve yeast and sugar in warm water. Let stand until creamy, about 10 minutes.
  2. In a small bowl, mix oil with italian seasonings and garlic powder (this will aid in equal distribution)
  3. Stir in flour, salt and oil mixture (a mixer works great for this, but you can do by hand if you don't have one. Just be sure to knead your dough long enough). Beat until smooth (I let mine knead for about 4-5 minutes in the mixer). Let rest for 10-15 minutes--the original recipe stated you could just let it sit for 5...I left mine a few minutes longer, and loved it. (flour amounts will vary---start with 5 and keep adding small amounts until it's smooth and not too sticky.)
  4. Turn dough out onto a lightly floured surface and pat or roll into a round ball. Divide into equal parts (you can make 2-3 medium pizzas with this recipe, so divide according to how many you would like) Transfer crust to a lightly greased pizza pan or a wooden paddle dusted with cornmeal (and then transfer to your pizza stone). Spread with desired toppings and bake in preheated oven for 15 to 20 minutes, or until golden brown. Let baked pizza cool for 5 minutes before serving.


***substitution for italian seasonings...1 tsp basil, 1 tsp oregano, and 1/2 tsp onion powder.

Be sure to cook long enough. The first pizza I made I cooked a little longer than the 2nd pizza, yet the first was PERFECT. Slightly crisp on the outside, and chewy (NOT DOUGHY...) on the inside.

Saturday, April 10, 2010

Bread bowl

This isn't really a recipe, per se, but a method I love and use every Easter for our rolls.

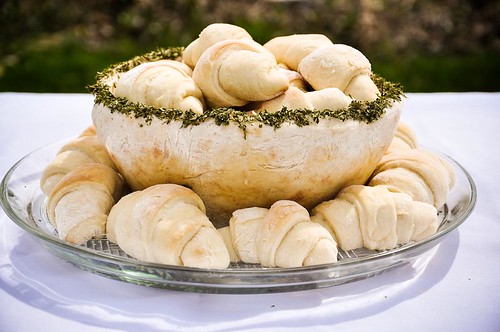
I made our favorite potato rolls to put inside, and while you can definitely use your roll dough for the bread bowl, I knew we wouldn't eat that part and decided to keep all the yummy rolls for us to eat, and make the bread bowl out of a quick pizza crust recipe. I used my friens Mindy's, which can be found here. (I halved this recipe because I knew I didn't need bigger than that for my size of bowl)

Take a smaller glass bowl (Pyrex or another oven safe bowl) and place upside down on a cookie sheet. Spray bowl with non-stick spray, and then press your dough around the bowl, making sure it's pressed evenly around.

Bake according to recipe--(mine I baked for about 13 minutes at 450) Remove from oven and let cool. (while cooling, I suggest rubbing butter out the dough, because it will give it a nice golden tone)

Flip bowl back the right way, and use a knife to gently loosen the bread from the glass bowl. Slowly take the glass bowl out, and voila! You have yourself a bread bowl!

I love the look of green rim, because it looks springy! To achieve this, I dabbed corn syrup along the entire rim, and then sprinkled it with parsley.

Such a fun centerpiece!!

Resurrection Rolls

This is one of our favorite Easter recipes--and also is a great teaching method for helping kids understand the religious side to Easter...HOWEVER, these are also SUPER tasty and would be great any time of the year.

But for the sake of Easter and teaching, here's how we do it in our house.

INGREDIENTS:

-cinnamon/sugar mixture
- 1/2 c melted butter
- refrigerator rolls (or crescents) or homemade dough
-large marshmallows

(the amount of the marshmallows and dough will depend on how many you are making--)
We always let the kids help with this part...

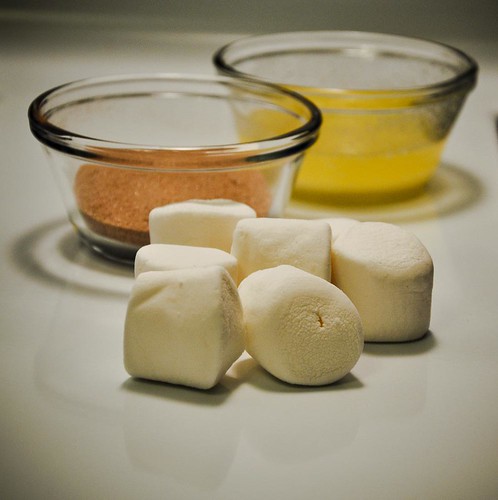
Dip your marshmallows in the butter and then in the cinn/sug mix. This represents Christ's body after he died, and when his disciples put oil and spices on his body.

If you are using refrig rolls, make sure they are flattened out to 4-5 inches wide--and then place your marshmallow in the center and pull the dough all the way around it, sealing tightly. If using crescents, roll up your marshmallow and tuck in the sides tightly. This represents Christ being placed in the tomb.

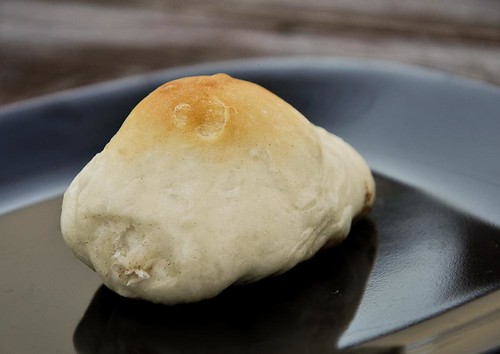
Bake as directed on the package (we talk about the 3 days during this time). Remove from oven and let cool briefly, then open. Your marshmallow will be melted, or as kids see it--GONE. This is where we talk about how the tomb was empty, and how Christ had risen!


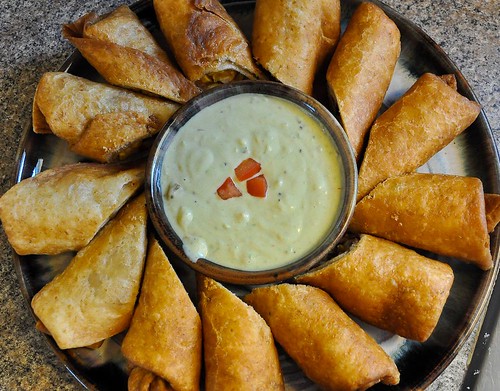
Southwest Eggrolls


1 chicken breast fillet
1 tablespoon vegetable oil
2 tablespoons minced red bell peppers
2 tablespoons minced green onions
1/3 cup frozen corn
1/4 cup canned black beans, rinsed and drained
1/2 tablespoon minced fresh parsley
1/2 teaspoon cumin
1/2 teaspoon chili powder
1/4 teaspoon salt
1 dash cayenne pepper
3/4 cup shredded Monterey jack cheese
5 7-inch flour tortillas


Preheat barbecue grill (or skillet) to high heat. Rub the chicken breast with some vegetable oil then grill it on the barbecue (or in the skillet) for 4 to 5 minutes per side or until done. Lightly salt and pepper each side of the chicken while it cooks. Set chicken aside until it cools down enough to handle.

Preheat 1 tablespoon of vegetable oil in a medium-size skillet over medium-high heat. Add the red pepper and onion to the pan and sauté for a couple minutes until tender. Dice the cooked chicken into small cubes and add it to the pan. Add the corn, black beans, parsley, cumin, chili powder, salt, and cayenne pepper to the pan.Cook for another 4 minutes.

. Remove the pan from the heat and add the cheese. Stir until the cheese is melted.

Wrap the tortillas in a moist cloth and microwave on high temperature for 1 1/2 minutes or until hot. Spoon approximately one-fifth of the mixture into the center of a tortilla. Fold in the ends and then roll the tortilla over the mixture. Roll the tortilla very tight, then pierce with a toothpick to hold together.

Repeat with the remaining ingredients until you have five eggrolls. Arrange the eggrolls on a plate, cover the plate with plastic wrap and freeze for at least 4 hours or overnight.

COOKING:

Preheat 4-6 cups of oil to 375 degrees. Deep fry the eggrolls in the hot oil for 12-15 minutes and remove to paper towels or a rack to drain for about 2 minutes.

Slice each eggroll diagonally lengthwise and arrange on a plate around a small bowl of the dipping sauce.


DIPPING SAUCE:

1/4 cup smashed fresh avocados (about half of an avocado)
1/4 cup mayonnaise
1/4 cup sour cream
1 tablespoon buttermilk
1 1/2 teaspoons white vinegar
1/8 teaspoon salt
1/8 teaspoon dried parsley
1/8 teaspoon onion powder
1 dash dried dill weed
1 dash garlic powder
1 dash pepper
Garnish
2 tablespoons chopped tomatoes
1 tablespoon chopped onions

Combine all ingredients in a bowl and garnish.

--A HUGE thanks to my sister-in-law Jenny for making these and introducing us to them! They are SUPER tasty!!!

Sunday, February 28, 2010

French bread rolls


French Bread Rolls

*Makes about one dozen rolls

1 1/2 cups warm water (110 degrees F/45 degrees C)
1 tablespoon active dry yeast
2 tablespoons white sugar
2 tablespoons vegetable oil
1 teaspoon salt
4 cups all-purpose flour

In a large bowl, stir together warm water, yeast, and sugar. Let stand until creamy, about 10 minutes.

To the yeast mixture, add the oil, salt, and 2 cups flour. Stir in the remaining flour, 1/2 cup at a time, until the dough has pulled away from the sides of the bowl. Turn out onto a lightly floured surface, and knead until smooth and elastic, about 8 minutes. Lightly oil a large bowl, place the dough in the bowl, and turn to coat. Cover with a damp cloth, and let rise in a warm place until doubled in volume, about 1 hour.

Deflate the dough, and turn it out onto a lightly floured surface. Divide the dough into 12-14 equal pieces, and form into round balls. Place on lightly greased baking sheets at least 2 inches apart. Cover the rolls with a damp cloth (or greased saran wrap), and let rise until doubled in volume, about 40 minutes. Meanwhile, preheat oven to 400 degrees F (200 degrees C).

Bake for 12-13 minutes in the preheated oven, or until golden brown.

*Can freeze the rolls after baking - microwave on high for 2 minutes before serving.

***If you want to make them crusty instead of soft, spray some water into the oven three times in the first five to six minutes of baking and brush them with an egg white/water mixture prior to baking. I personally love a soft roll, so I baked without doing the extra steps and then covered them in delicious butter after they were cooked. SO delicious!!!


Tuesday, February 23, 2010

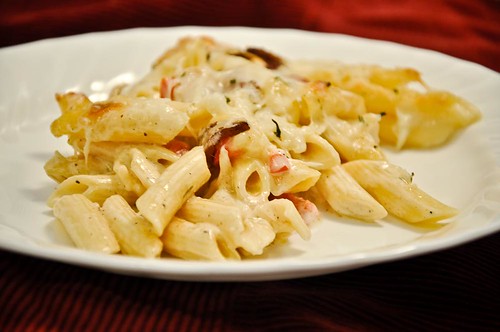
Penne Rustica


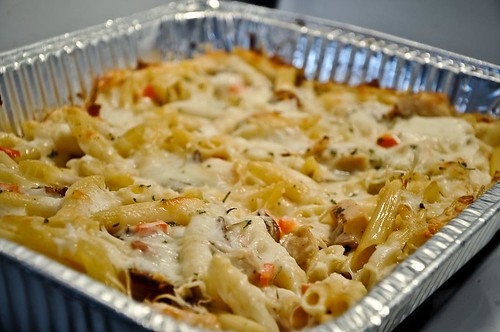
You can find the original to this recipe on home based mom. I came across her blog this week and have fallen in love with so many of her recipes! We tried this tonight and it was SO good. MAKES LOTS, so it's a perfect meal to make one for our family and still have a whole dinner to take someone else too. If you want to see the HUGE batch (this doubled) you can find it here.

Here's the recipe with my alterations...

PENNE RUSTICA

Ingredients:
1/2 pound grilled chicken breast
7-8 slices of thick cut bacon
24 oz (1 1/2 boxes) penne pasta
1 large red bell pepper- diced
1/2 cup grated parmesan cheese
1/4 tsp paprika

Gratinata Sauce:
1 tsp chopped garlic
1 cup marsala wine OR (if you don't cook with wine, you can use this as a substitute:
3 TBSP apple juice + 1 tbsp red wine vinegar + enough chicken broth to equal 1/2 cup
1/2 tsp dijon or dry mustard
1/2 tsp salt
1/2 tsp chopped rosemary
1/8 tsp cayenne pepper
4 cups heavy cream

Directions:

Chop bacon and cook in large pan. Once it's cooked, remove bacon and drain all but about 1 tsp of grease. Saute garlic in bacon grease briefly. Add marsala wine (or your substitute), mustard, salt, rosemary, cayenne pepper, and heavy cream. Cook pasta according to directions. Slice chicken into medium-bite size pieces. Combine sauce, cooked pasta, diced chicken, cooked bacon, bell peppers, parmesan cheese, and paprika and mix thoroughly. Spread in 2 - 9x13 pans. Top with chopped rosemary and mozzarella cheese.

Bake @ 475 for 10 minutes. (doesn't need long since it's everything is already cooked)

If frozen, thaw in refrigerator the day of. Cover with foil and bake @ 375 for 1 hour. Remove foil during the last 15 minutes.


Monday, February 22, 2010

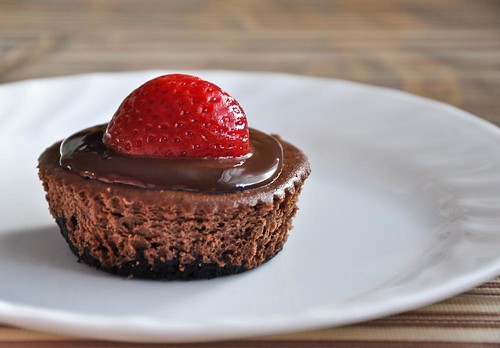
"healthified" chocolate cheesecakes

I recently came across this recipe in the Eating Better America newsletter and had to try it out when we had company tonight. YUM. :) It was rich and creamy, and just the right portion size for a post-dinner sweet treat. And best of all, it was easy to make!

For the original recipe, click
here.

Cheesecakes
12foil baking cups
12thin chocolate wafer cookies (from 9-oz package), crushed (2/3 cup)
12oz 1/3-less-fat cream cheese (Neufchâtel), softened
2/3cup sugar
2teaspoons vanilla
1/4cup unsweetened baking cocoa
1whole egg
1egg white
1oz bittersweet or semisweet baking chocolate, melted

Topping
1/3cup fat-free hot fudge topping
Fresh raspberries, if desired (I used strawberries)
1.Heat oven to 325°F. Place foil baking cup in each of 12 regular-size muffin cups. With back of spoon, firmly press slightly less than 1 tablespoon cookie crumbs in bottom of each foil cup.
2.In large bowl, beat cream cheese with electric mixer on medium speed until creamy. Beat in sugar and vanilla until fluffy. Beat in cocoa. Beat in whole egg and egg white until well blended. Stir in melted chocolate. Divide cheese mixture evenly among crumb-lined foil cups.
3.Bake 28 to 32 minutes or until set. Cool in pan on cooling rack 15 minutes. Remove cheesecakes from pan; cool 15 minutes longer. Refrigerate about 1 hour or until chilled.
4.To serve, carefully remove foil baking cups. Spread fudge topping on cheesecakes. Garnish with raspberries. Store cheesecakes covered in refrigerator.

Sunday, February 21, 2010

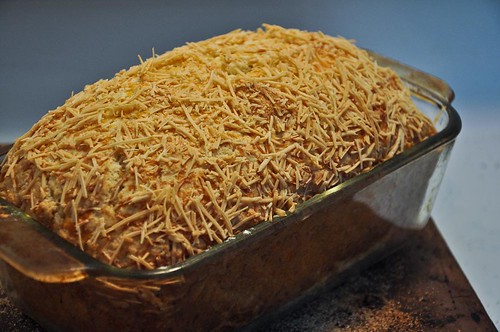
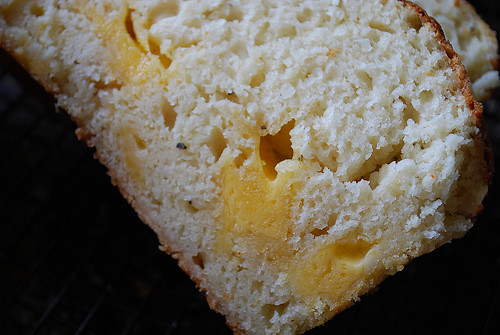
Quick cheese bread


(this picture is courtesy of homebasedmom.com)

Want a quick, foolproof cheesy bread?? This is for you! I really wanted to make rolls for dinner last night, but didn't want the whole rise and roll mess. I stumbled across this on yourhomebasedmom.com, and DANG was it good! :) SO cheesy and EASY! Click here to see the original recipe.

3 ounces Parmesan cheese, shredded on large holes of box grater (about 1 cup)
3 C (15 ounces) all-purpose flour
1 Tbsp baking powder
1/4 tsp cayenne pepper
1 tsp salt
1/8 tsp black pepper
4-5 ounces sharp or extra-sharp cheddar cheese, cut into ½-inch cubes
1 1/4 C milk
3 Tbsp butter, melted
1 large egg lightly beaten
3/4 C sour cream

Adjust an oven rack to the middle position in the oven and preheat oven to 350 degrees. Spray a 5 by 9-inch loaf pan with nonstick cooking spray, then sprinkle 1/2 cup of the Parmesan cheese evenly in bottom of pan.

In a large bowl, whisk flour, baking powder, cayenne, salt, and pepper to combine. Using a rubber spatula, mix in cheddar cheese cubes, breaking up clumps, until cheese is coated with flour. In a medium bowl, whisk together milk, melted butter, egg, and sour cream. Using a rubber spatula, gently fold wet ingredients into dry ingredients until just combined (the batter will be heavy and thick). Do not overmix. Scrape batter into prepared loaf pan; spread to sides of pan and level surface with a rubber spatula. Sprinkle remaining 1/2 cup Parmesan evenly over surface.

Bake until deep golden brown and toothpick inserted into the center of the loaf comes out clean, 45 to 50 minutes. Cool in pan on wire rack 5 minutes; invert loaf from pan and continue to cool until warm, about 45 minutes. Cut into slices and serve.

****my notes to this...I put too much parm. cheese on mine, so it was a little hard to cut. Now I know, more cheese is not necessarily a better thing. :) I also didn't have cubed cheese, so I had to use the shredded I had on hand. It was still delicious, but I can't wait to make this again with yummy big pockets of cheese. I am sure it will top the charts with this!

Friday, January 8, 2010

Funeral Potatoes (cheesy potato casserole)

I have had several recipes that I make OFTEN and have realized lately that they are not on here yet! While I love to put a picture up right when I post, I want to get these on and post pics as I make them, so I can stop hunting for the recipe when I need it!

I am finally to the point in this pregnancy that cooking sounds GOOD again! I have some yummy things to share and hope I can get back on the meal bandwagon!

I have heard this dish called a million other things, but being from back West, this always showed up at funerals and my family (along with many others) have always called it funeral potatoes. :) We love to eat it with ham--but it works as a meatless main dish when we need.(and my kids GOBBLE this up every time)

1 can cream of mushroom soup
1 C sour cream
3/4 C Grated cheddar cheese
1/3 C Onions
1/2 C Milk


Mix all these ingredients together (I actually just mix them right in the 9x13 pan to save myself from cleaning another dish) and then add:

1 30 oz. package of frozen hash browns***

Stir well.

Melt butter.

and add to:
2 C crushed cornflakes

(sometimes I like to add extra crunch so I will adjust accordingly)

Sprinkle over potato mixture and bake at 350 for 30 min.


***the original recipe calls for 6 potatoes, peeled, cooked and grated...but I have to go for time-saving simple shortcuts, so I just use the frozen potatoes now. :)

Sunday, August 16, 2009

Orange Julius

This is a DEFINITE family favorite for breakfast! We have also taken the leftovers (when there actually are some) and put them in little cups with popsicle sticks to have orange julius popsicles. :)

ORANGE JULIUS

1 C water
1 C milk
1/3 C sugar
1 tsp vanilla
1/2 carton of orange juice concentrate
12-18 ice cubes

In a blender, put all ingredients. Mix well for a few minutes until all the ice is crushed and the drink is thick and creamy. Serve immediately.

Tuesday, August 11, 2009

Bajio Sweet Rice


Original recipe found here

BAJIO SWEET RICE


*1/2-1 tablespoon vegetable oil
*1/2 of a white onion, chopped (add more or less to your taste)
*1/2 bunch fresh cilantro
*1 1/3 cups white rice
*3 cups chicken broth
*1/4-1/2 cup white sugar

Directions


Put a little oil in bottom of pan (maybe about 1/2-1 tablespoon).

Saute chopped onion until translucent. Add the chopped cilantro (no big stems) and saute a minute more.


Add the rice, cooking until it is light brown (being careful not to burn).


Combine the chicken broth and sugar, letting sugar dissolve. Then stir into rice until combined. Bring to a boil.


Cover and let cook on low, med-low until rice is done, about 25-30 minutes. Fluff with a fork before serving.

*****NOTES:

I actually wish I had added a little bit of onion powder to this to help ground the sweetness. However, it was REALLY tasty either way. I threw in some chopped red pepper, and we love that.

VERY TASTY...VERY EASY...especially if you are missing good ol' Bajio. :)

Cafe Rio Sweet Pork

First off, I have to give credit to where I actually found this recipe. Click here for the original.

A lot of the recipes I found online for the Cafe Rio sweet pork used more expensive cuts of meat than I was willing to buy. :) So I bought a cheap boneless pork roast to make mine with. Because of this, I was afraid to use one of the recipes that had a shorter cook time since I wanted to make sure my roast was really good and tender.

Turns out it wouldn't have mattered anyway because my meat was ready to shred at a shorter time than I thought. But my point is, that's what peaked my interest in this recipe.

(I am going to write this recipe with my own variations)


3 1/2 pounds Boneless pork roast
3 cans Coke (NOT diet) (though I have heard Dr. Pepper works too)
1/4 c. brown sugar
dash garlic salt
1/4 c. water
1 can sliced green chilies
1 can red enchilada sauce
1 c. brown sugar

Put the pork in a heavy duty ziploc bag to marinade. Add about a can and a half of coke and about 1/4 c. of brown sugar. Marinade for a few hours or overnight. (I marinated overnight for ease in cooking)

Drain marinade and put pork, 1/2 can of coke, water, and garlic salt in crock pot on high for about 3-4 hours (or until it shreds easily, but don't let it get TOO dry) or on low for 8 hours. Remove pork from crock pot and drain any liquid left in the pot. Shred pork.

(I cooked mine for 4 hours on high. Basically started the crockpot first thing in the morning and left it until lunch time.)

In a food processor or blender, blend 1/2 can Coke, chilies, enchilada sauce and remaining brown sugar (about a cup, you can add a little more or less to taste..). If it looks too thick, add more Coke little by little.

Put shredded pork and sauce in crockpot and cook on low for 2 hours.

---THIS WAS SOOO YUMMY! Worth the wait! Also, in regards to the coke, chilies, enchilada saic and brown sugar mixture that you blend together, I did that in the morning, so the evening prep was SO MINIMAL.

Served with Bajio Sweet rice and tortillas, and red pepper corn. YUM!

Wednesday, May 20, 2009

Scrumdidlyumptious chocolate chip cookies...

The is a recipe passed down through the grapevine...from my sister who got it from here sister-in-law who got it from her famlily. :) And it is SOOOOO good. THE BEST chocolate chip cookie recipe I have ever had.

And because it's hers, I am passing it on as she wrote it. PICTURES to come!


1 c sugar
1 c brown sugar
1 c shortening
2 eggs
1/2 tsp salt
2 tsp vanilla
1 tsp baking soda
2 1/4 - 2 1/2 c flour
2 c chocolate chips

Preheat oven to 325. Mix the two sugars and the shortening together until smooth. Add the rest of the ingredients except flour and mix well. Add flour and mix well. Stir in chocolate chips. Drop batter by spoonfuls onto ungreased cookie sheet. Bake for 11-12 minutes.

Notes from the source: Experiment with the amount of flour you use. I prefer to use 2 1/4 cups, because I like my cookies a little chewier. 2 1/2 cups will make them a little thicker. At high altitude in Colorado (where my dad put together this recipe), we bake the cookies for exactly 11 1/2 minutes, and they come out perfect. I usually have to cook them for several minutes longer in California. And they won't look quite done when you take them out - if the tops begin to look brown, they've cooked too long. We take them out and let them harden up on the cookie sheet for a few minutes, and then cool them on a cookie rack, so the bottoms don't burn on the hot pan. I know it's a lot of detailed instructions, but my family is kind of obsessive about cookies, and we've spent a lot of time trying to get it right. The recipe allows for a lot of playing, though - I will often throw in some oatmeal, or some toffee chips, or other things.

YUMMMMMMMY!

Thursday, February 26, 2009

Yogurt sundaes

I don't know that I can really call this a "RECIPE", but I put it here because it's something my kids LOVE. :)

Yogurt for breakfast is okay...but yogurt sundaes are gobbled right up. I have to admit, I think they are pretty tasty too. You could add any kind of toppings you like, but for us we use:

-About half a cup of Danon Light and Fit yogurt (you could choose any you want, but this is pretty much the only kind I can get at my grocery store)

-banana (cut how you like)

-Cool Whip

-fun sprinkles

-cherry on top

Tasty, tasty...the kids go wild!

Friday, February 13, 2009

Better than sex cake

WOW! 3 whole months since my last post. I can't believe it...I have been busy with a move, the holidays, family coming to visit, and the winter blahs...anyone else feeling that way?? I have so many recipes to post! I took pictures over the past few months, and now I just need t get myself motivated to put it all on here.

I have been thinking about the big Valentine's day dinner tomorrow. I can't decide what to do! I would love to hear what you are planning--if anyone is willing to give some ideas! Last year we did our own tour of Italy with a sampling of chicken Parmesan, baked ravioli, and fettuccine Alfredo. Salad and breadsticks made the meal complete and we finished it off with some better than sex cake. (though, we had the missionaries from our church over for dinner, so we called it better than baptism cake! :)

That reminded me I never posted the recipe for it! So, here goes~

1 German chocolate or other chocolate cake, baked, 13x9x2-inch
3/4 cup fudge topping
3/4 cup caramel or butterscotch topping
3/4 cup sweetened condensed milk
1 bag of toffee pieces
1 tub of whipped topping

To make this in a regular 9x13 pan:
Bake cake as directed on box. After the cake has cooled, Pour (one at a time) fudge, butterscotch, and condensed milk over the top of the cake and let each flavor soak in before adding the next. Put desired amount of toffee on the top. Frost the cake with the whipped topping and remaining toffee pieces to decorate the top.

To make this in a trifle dish (like I did):

Bake cake as directed. After the cake has cooled, cut into small pieces and divide into 3 parts. Layer the bottom with 1/3 of the cake pieces. Drizzle 1/4 C of the chocolate fudge, 1/4 C of the Carmel, and 1/4 C Of the sweetened condensed milk. Top with desired amount of toffee pieces and put a layer of cool whip. Repeat layers 2 more times ad top with cool whip and toffee pieces.

This dessert is really good if you let it sit for a bit before serving. Let chill in the fridge for a couple hours or even sit overnight. It's so yummy letting all the flavors mix together.

Enjoy your Valentine's day everyone!

Saturday, November 8, 2008

Turtle Pumpkin Pie


Just the other day I was thinking I have too many dessert recipes on here...is that really possible?? Well, aparently not. Here's one more! :)

TURTLE PUMPKIN PIE

1/4 cup plus 2 Tbsp. caramel ice cream topping, divided
1 Graham Pie Crust
1/2 cup plus 2 Tbsp. Pecan Pieces, divided
1 cup cold milk
2 pkg. (3.4 oz. each) Vanilla Flavor Instant Pudding
1 cup canned pumpkin
1 tsp. ground cinnamon
1/2 tsp. ground nutmeg
1 tub (8 oz.) Whipped Topping, thawed, divided


POUR 1/4 cup caramel topping into crust; sprinkle with 1/2 cup pecans.
BEAT milk, pudding mixes, pumpkin and spices with whisk until blended. Stir in 1-1/2 cups COOL WHIP. Spread into crust.

REFRIGERATE at least 1 hour. Top with remaining COOL WHIP, caramel topping and pecans just before serving.

*** OH MY GOSH! THIS IS AMAZING! I just got my Kraft foods magazine this week and saw this recipe. I was anxious to try it because we were having company and I needed a dessert. This was SO quick--but it ended up the PERFECT combo. I actually don't care for straight pumpkin pie...But this recipe won me over! We will make this again and again!

see original recipe here

Wednesday, October 8, 2008

Turkey Sandwiches - just an idea...

I use this blog to give me ideas when I can't quite figure out what I want for dinner. So, I figured it fitting to put my picture of my tasty turkey sandwich, baked lays, and fresh fruit. Yes, we ate this for dinner. And it was DELICIOUS!

Nothing groundbreaking about my sandwich...just the basics--turkey, lettuce, cheese, bacon. But I definitely crave this kind of fresh food many times!

So, consider this just an idea...maybe browsing through the recipes and seeing their pics will help you decide what to make for dinner too! :)

Swiss Steak


Warm and tasty...a great comfort food. And sorry about the picture. Some things taste great and look terrible! :)

Swiss Steak:
1 lb. round steak, cut into 4 pieces.
1/2 C flour
1/4 tsp. salt
dash of pepper
1/2 tsp. garlic herb seasoning
2 T vegetable oil (or olive oil)
1 medium onion, sliced
2 C water
2 beef boullion cubes

Combine flour and seasonings in a flat dish. Dredge steak pieces in seasoned flour mixture and pound with meat mallet until steaks are about 3/8 inch thick and flour is pounded into the meat.

Heat 2 T oil in large frying pan over medium heat. Add meat. Brown well on both sides.

Once browned, add onions, add water and boullion cubes. Cover with tight lid and turn to medium low heat, cooking for an additional 1-2 hours, adding water as needed.
****Keep an eye and check every 20 minutes or so to make sure it doesn't dry up. You can also do this in the oven instead, placing it in a casserole dish and adding an additional 2-3 cups in advance, covering with foil while cooking.

Use drippings for gravy! Yum...

Apple Cinnamon Rolls

This recipe is SO easy and SO impressive. Who ever would have thought that marrying canned cinnamon rolls and apple pie filling would be SO GOOD???

-2 cans of refrigerator cinnamon rolls (whatever brand you like) The ones that come in a tube

- 1 can of apple pie filling

Spray muffin tins and put one slice of cinnamon roll dough in each muffin spot. Press gently up the sides of the tin, forming a little cup. Fill with apple pie filling. Continue until your tin is full. Bake as per directions on roll dough. Remove from tin to cool and drizzle the frosting from the cinnamon rolls package on your apple cinnamon rolls.

EASY Chicken Rice Soup

Got this recipe from a gal over at Apron Girl's. I am going to post her original recipe and then the variations I made. :)

Chicken Rice Soup

1 boneless skinless chicken breast,cut into cubes
1 large can of chicken broth
1/2 a box of Uncle Ben's Long grain wild rice (Use half the rice mixture and half the seasonings mixture and save the rest for another time)
cut up some carrots

Put it all in a pot and cook on medium heat for 1 hour.


OKAY, My variation:
-2 boneless skinless chicken breasts (already cooked--I cook them ahead and freeze them) Cut into cubes.
-1 large can of Chicken broth (plus a little more water added at the end of cooking--you can decide how much to add as per how much rice you decide to use.
-1 whole box of uncooked Uncle Ben's long grain wild rice, using all seasonings as well.
-half a bag of frozen cut carrots.

This was seriously 20 minutes. Hardly any prep. Done. :) And it was SO delicious. Because I used the whole box of rice, I did add a little bit of water with a bullion cube at the end and let it dissolve before serving, just so my soup wasn't too thick with the rice. But I thought it was PERFECT.

Friday, September 5, 2008

Pizzadillas

I was totally unhappy with how the picture of this meal turned out, so I will add it later. I am sure we will eat it again VERY soon!

Perhaps someone out there has heard of this, read the recipe somewhere, or even made it. But I sure hadn't...it was my little stroke of genius *that probably wasn't genius after all) in the middle of dinner one night when my 3 small children were trying to eat pizza.

I realized it would be SO much easier to eat if the sauce were Off the pizza instead of ON the pizza. And so, pizzadillas were created. A perfect blend between pizza and quesadillas.

SO SIMPLE...perfect lunch in a hurry. All you need are:

-tortillas
-cheese
-pizza toppings
-pizza sauce for dipping (I like to buy this in the squirt bottle so I am not wasting anything)

Preheat pan to low-medium heat. Take one tortilla and put cheese and toppings on on half. Fold over and place in pan. Because cooking heat varies so much, just keep an eye until your tortilla is golden brown, then flip it over and cook the other side.

Remove from pan and let cool, for a minute. Cut into wedges with pizza cutter. Serve your tasty pizzadillas with a little mound of pizza sauce for dipping.

DELICIOUS! :)

Thursday, August 21, 2008

Stuffed Pancakes (cream cheese filling)

What I REALLY wanted to eat was stuffed french toast...but with no bread on hand, my dream was not realistic. And so stuffed pancakes was born...
I know IHOP and other breakfast places do the same type of thing but I couldn't find the recipe online for how to make the DIVINE cream that goes in between the layers.
So I made my own--and I was quite impressed. :)
If you alter this, I would love to know what you do so I can try it out. This was a one time try but I loved the difference it made for my pancakes! :) PLEASE leave a comment if you have something to add or change.
4 oz cream cheese
1 small box of french vanilla pudding (though, I imagine regular vanilla would be fine too--I just had the french vanilla on hand)
1 1/2 C Milk
1/4 C powdered sugar
cinnamon to taste
Mix the pudding and milk together until smooth, add cream cheese and mix thoroughly. Add powdered sugar and cinnamon. Mix through.
Add on your pancakes or french toast while warm and serve with fresh fruit and whipped topping. Store covered in fridge.
***One thing I might change for next time I make this, is to add some whipped topping to make it a tad bit lighter while mixing. So, if you try that let me know!! :)

No Bake Peanut Butter Pie


1 (8 ounce) package cream cheese
1 1/2 cups confectioners' sugar
1 cup peanut butter
1 cup milk
1 (12 ounce) package frozen whipped topping, thawed
1 (8 oz) package whipped topping
2 (9 inch) prepared oreo crusts
Chopped Reeces Peanut butter cups--as many as desired


DIRECTIONS
Beat together cream cheese and confectioners' sugar. Mix in peanut butter and milk. Beat until smooth. Fold in 12 oz. whipped topping.
Spoon into two 9 inch crusts; cover, top with additional whipped topping and chopped peanut butter cups and freeze until firm.
***side note: This is DELICIOUS. Sigh....I could eat this daily, no joke. And the best part is that you can substitute ALL the ingredients for a lower fat/calorie/sugar substitute and it STILL turns out so good. I LOVE that this dessert makes two in one shot. We always eat one the same night and save another for a different night or when we need a last minute dessert. And as untraditional as this may sound, one of these ALWAYS makes it's way to our Thanksgiving feast. :)

Berry Muffins


PREP TIME 15 Min
COOK TIME 25 Min
READY IN 40 Min

Original recipe yield 8 large muffins

1 1/2 cups all-purpose flour
3/4 cup white sugar
1/2 teaspoon salt
2 teaspoons baking powder
1/3 cup vegetable oil
1 egg
1/3 cup milk
1 cup fresh blueberries (or other berries) I used fresh raspberries for this pic.
1/2 cup white sugar
1/3 cup all-purpose flour
1/4 cup butter, cubed
1 1/2 teaspoons ground cinnamon


DIRECTIONS
Preheat oven to 400 degrees F (200 degrees C). Grease muffin cups or line with muffin liners.
Combine 1 1/2 cups flour, 3/4 cup sugar, salt and baking powder. Place vegetable oil into a 1 cup measuring cup; add the egg and enough milk to fill the cup. Mix this with flour mixture. Fold in blueberries. Fill muffin cups right to the top, and sprinkle with crumb topping mixture.

To Make Crumb Topping: Mix together 1/2 cup sugar, 1/3 cup flour, 1/4 cup butter, and 1 1/2 teaspoons cinnamon. Mix with fork, and sprinkle over muffins before baking.
Bake for 20 to 25 minutes in the preheated oven, or until done.

***I TRIPLED this recipe and ended up with about 16 BIG muffins and a large pan on mini muffins--I wish I could say we froze them all, but they were so good we gobbled several up right there on the spot, fresh out of the oven. However, the remainder of them went in ziplock baggies and were stored for future breakfasts. These are super easy to heat and eat--15-30 seconds in the micro and they are ready to go!

Sunday, August 3, 2008

PB Candy cake

PB Candy cake...
chocolate + peanut butter = pure bliss

I got this from the Kraft foods magazine...gosh, I love that magazine! :) It was originally called Chocolate Peanut Butter Candy Dessert...but really, that sounds totally lame. So, I made up my own name for it. :) This is SO easy--whipped it up in a few minutes and all I had to do was let it sit in the fridge while we went about out day...

12 OREO Cookies, crushed
2 Tbsp. butter, melted
1/2 cup peanut butter
2 cups cold milk
2 pkg. (4-serving size each) JELL-O Chocolate Instant Pudding
2 cups thawed COOL WHIP Whipped Topping, divided
2 Tbsp. hot fudge ice cream topping
1/4 cup candy-coated peanut butter pieces


MIX crushed cookies and butter; press firmly onto bottom of 8-inch square pan.


PLACE peanut butter in large bowl. Gradually add milk, stirring with wire whisk until well blended. Add dry pudding mixes. Beat 2 min. or until well blended. (Mixture will be thick.) Stir in 1 cup of the whipped topping. Spread onto prepared crust; top evenly with remaining 1 cup whipped topping.


REFRIGERATE 3 hours or until set. When ready to serve, microwave fudge topping as directed on package; drizzle over dessert. Sprinkle with candies. Store leftovers in refrigerator.

Saturday, August 2, 2008

Snickers Salad

I know, I know...risen from the dead. I am sorry to have gone M.I.A. for most of the summer...we haven't done a whole lotta cookin'. That's a real confession right there. :) A true confession.

But I am back on track--my meals are planned for the month and I have some exciting things to post here in the next few weeks.

I thought I would start with a barbecue favorite...snickers salad. The perfect blend of the good stuff (fruit) and the good stuff (chocolate). I don't know if this is classified as a fruit salad (side dish) or a tasty dessert...so, we eat it as a side salad (gives us a reason to eat something different for dessert...are we horrible or what?!)

EASY, EASY, EASY...Kind of reminds us of carmel apples because as the snickers sit and soften in the creamy mixture, the carmel starts to "melt" and mix with the apples...yummm...

1 small box of vanilla pudding
1 1/2 cup milk
12 oz. whipped cream
1 bag of snickers miniatures (unwrapped and chopped)
2 granny smith apples and 2 red delicious apples (I know some people only use the granny smith, but I love red delicious...so that's my variation)

In a bowl, mix the pudding mix and milk together beating until smooth. Fold in the whipped cream. Add the chopped snickers and chopped apples pieces and mix together. Let sit in fridge for about 2 hours.

Serve...if you are really okay to share. :)

oh, and side note...make sure to clarify with people that this is not potato salad. It kind of looks like it if you are just glancing at the dishes. :) That's why I add shaved chocolate on top!

Monday, April 21, 2008

Flank Steak with Corn and Red Pepper Quesadillas

I originally got this recipe from the Good Housekeeping magazine. You can check it out here. We've made a few changes here and there...and we love this on a Spring/Summer night. It makes a great alternative to the normal barbecue!

1 lime
4 teaspoon chili powder
1 1/2 teaspoon ground cumin
1 teaspoonbrown sugar
Salt
1 (about 1 1/4 pounds) beef flank steak
3 ears corn, husks and silks removed (or we use a few small frozen ones sometimes)
1 large red pepper, seeded and cut into quarters
4 (8-inch) flour tortillas
3/4 cup(s)(3 ounces) shredded reduced-fat (2%) Mexican-style cheese (and yes, the Mexican style DOES make a difference)
2 green onions, thinly sliced (we omit these)
Plain fat-free Greek yogurt or low-fat sour cream (optional)

Prepare outdoor grill for covered direct grilling over medium heat.

From lime, grate 1 teaspoon peel and squeeze 1 teaspoon juice. In small bowl, combine lime peel and juice, chili powder, cumin, sugar, and 1/4 teaspoon salt. Rub steak with chili powder mixture to season both sides.

Place steak, corn, and pepper on hot grill rack. Cover grill and cook steak and vegetables 12 to 15 minutes or until corn is browned in spots, pepper is lightly charred and tender (turning vegetables occasionally), and steak is medium-rare or desired doneness (turning steak over once).

As vegetables are done, transfer to cutting board. Transfer steak to another cutting board; let stand 10 minutes to allow juices to set for easier slicing.

When vegetables are cool enough to handle, cut kernels from cobs and coarsely chop pepper. Place tortillas on work surface. Evenly divide cheese, green onions, corn, and peppers on half of each tortilla. Fold each tortilla over filling to make 4 quesadillas. Grill quesadillas about 2 minutes or until browned on both sides, carefully turning over once. Return quesadillas to same cutting board; cut each in half.

Thinly slice steak and serve with quesadillas and yogurt if using.


Serves 4

***My kids love these quesadillas. They are full of good stuff and are easy to handle!

Wednesday, March 26, 2008

Chewy Popcorn Balls


3/4 C brown sugar
1 stick of butter or margarine
10 Large marshmallows
1-2 bags unbuttered popcorn (though, I just used 9 cups of regular popper-popped corn)
Melt brown sugar, butter, and marshmallows in a saucepan until all blended and melted. Pour of popped corn. Still well. Then shape into ball and let sit on wax paper. I would say we got about 12 medium sized popcorn balls--though your amount could vary depending on how big or small you make them.
ENJOY! These are soft and chewy but no super sticky. YUM!

Saturday, March 22, 2008

Creamy Tortellini Alfredo

Makes:6 servings, 1 cup each

1 can (14-1/2 oz.) fat-free reduced-sodium chicken broth
1 cup water
2 pkg. (9 oz. each) refrigerated cheese tortellini
4 oz. (1/2 of 8-oz. pkg.) PHILADELPHIA Cream Cheese, cubed
1 cup frozen peas
3/4 cup Finely Shredded Italian* Five Cheese Blend
6 slices Bacon, cooked, drained and crumbled

POUR broth and water into large saucepan; stir. Bring to boil on medium-high heat. Add tortellini. Reduce heat to medium-low; cover. Simmer 8 to 9 min. or until tortellini is tender. (Do not drain.)
ADD cream cheese and peas; stir. Heat 2 to 3 min. or until cream cheese is completely melted, stirring occasionally.
STIR in shredded cheese and bacon.
See the original recipe HERE at Kraft foods.

Monday, March 17, 2008

Potato Rolls

These are soft and delicious!


1 C hot water

1 C instant potatoes


Combine above and let sit


1 T yeast in 1 ½ C warm water, let sit until yeast activates

In a mixer cream on low:
1/2 C sugar
1 ½ tsp salt
2/3 C butter
2 eggs

Then add:
3 C flour
Yeast mixture
Add: another 2-3 C flour, mix 6 minutes on low with dough hook. Rise (covered) 1 hour
Punch down.
Roll out and shape as you would like (I found a GREAT article for how to make many different roll shapes, You can see that here. I did mine in the crescent shape)

Bake at 375° 10-12 minutes

SERVING: 36 soft and delicious dinner rolls - 3 pt+ each

For an extra yummy treat:

Orange roll filling
¼ C butter
½ C sugar
1 T orange juice concentrate
1 tsp. McCormick orange peel

Orange glaze
1 C powdered sugar
3 T orange juice
1 tsp. vanilla